Arkadaşlar merhaba uzun zamandır epey bir uğraştığım proje var şifreli kilit projesi üzerinde çok çalışma yaptım ve lcd ekran ekleyerek bazı modifiyeler yaptım istediğiniz haneli şifre koyabilirsin lakin şifreyi usb sürücüsü ile pcden değiştirmeniz lazım onun haricinde sistemden şifre değiştiremezsiniz *-#-tarzında şifreler dahi koyabilirsiniz.
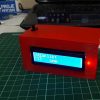
Aşağıdaki resimler ise projeye ait resimlerdir sizlerde bu tarzda telefon kutusuna muhafaza ederek dilediğiniz yerlerde kullanabilirsiniz bir diğer etkende;
#include <LiquidCrystal.h>   // Include LiquidCrystal library
#include <Keypad.h>    // Include Keypad library
LiquidCrystal movie(A5,A4,A3,A2,A1,A0);
#define Password_Length 8     // Length of password + 1 for null character
char Data[Password_Length];     // Character to hold password input
char Master[Password_Length] = "12A34B5";   // Password
char customKey;  // Character to hold key input
int electric_motor = 10;   // Pin connected to Electric Motor
int buzzer = 11;   // Pin connected to Buzzer
int indicator_led = 12;   // Pin connected to Green Indicator LED
int k ;
int i = 0;
int s = 0;
int g = 0;
int a = 0;
int wait = 300; // Delay time for LED
byte data_count = 0; // Counter for character entries
const byte ROWS = 4; // Constants for row sizes
const byte COLS = 4; // Constants for column sizes

char hexaKeys[ROWS][COLS] = {  // Array to represent keys on keypad
{'1', '2', '3', 'A'},
{'4', '5', '6', 'B'},
{'7', '8', '9', 'C'},
{'*', '0', '#', 'D'}
};

byte rowPins[ROWS] = {9, 8, 7, 6};  // Connections to Arduino
byte colPins[COLS] = {5, 4, 3, 2};
Keypad customKeypad = Keypad(makeKeymap(hexaKeys), rowPins, colPins, ROWS, COLS); // Create keypad object

void setup() {

  pinMode(electric_motor, OUTPUT);  // Set Electric Motor pin as an OUTPUT pin
  pinMode(buzzer, OUTPUT); // Set Buzzer pin as an OUTPUT pin
  pinMode(indicator_led, OUTPUT); // Set Green Indicator LED pin as an OUTPUT pin
  Serial.begin(9600);    // Initialize serial communications at 9600 baud rate
  movie.begin(16,2);  // Initialize LiquidCrystal display
  Serial.print("Enter Password:");
  movie.print("Enter Password:");
  delay(1500);
  movie.clear();

}
void loop() {


for(k=0;k<7 && g<1;k++)          // "For loop" for taking Input
{
  movie.setCursor(0,0);
 movie.print("Enter Password:");
 delay(100);

 customKey = customKeypad.getKey();  // Look for keypress
if (customKey) {                    // Enter keypress into array and increment counter
 Data[data_count] = customKey;
   Serial.print(Data[data_count]);

   movie.setCursor(s,1);           // LCD Command for changing the column of second row
   movie.print(Data[data_count]);

   digitalWrite(indicator_led,HIGH);  // Blink the green indicator LED with every successful input
   delay(wait);
   digitalWrite(indicator_led,LOW);
   delay(wait);

   data_count++;
   s++;
}
}


if (data_count == Password_Length - 1) {   // See if we have reached the password length
 while(i<1)
{
 Serial.println("");                      // For sending the serial monitor's cursor in next line
 movie.print("");
 i++;
}

 if (!strcmp(Data, Master)) {     // Password is correct

   digitalWrite(electric_motor, HIGH);
   digitalWrite(buzzer, LOW);
   Serial.println("correct");
   movie.clear();
   movie.setCursor(0,0);
   movie.print("The password is");
   movie.setCursor(0,1);
   movie.print("correct");
   delay(1000);
   movie.clear();
   g=1;
}
else {

   digitalWrite(electric_motor, LOW);     // Password is incorrect
   digitalWrite(buzzer,HIGH);
   Serial.println("incorrect");
   movie.clear();
   movie.setCursor(0,0);
   movie.print("The password is");
   movie.setCursor(0,1);
   movie.print("incorrect");
   delay(1000);
   movie.clear();
   g=1;
}
}
   a=1;
}
void clearData() {
while (data_count != 0) {     // Go through array and clear data
Data[data_count--] = 0;
}
return;
}
























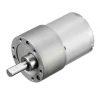












Hocam Motor sürücü olmadan motor nasıl çalıştırıyor.
Örnek olarak göstermiş. İleri seviyede röle kartı kullanıp röle üzerinden herhangi bir şeyi çalıştırabilirsin.